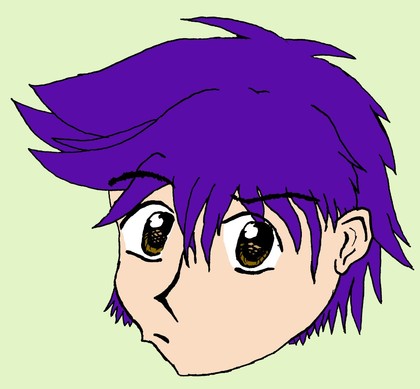
 Here’s that “REALLY good manga-style head” I was talking about a few posts back. Of course, a pure manga head would be naught but greyscale or even B&W. But hey, I like mine with flavor. Looks like Lyle {spoilerspoiler}
Oh yeah, here’s how it’s done in GIMP, picking up from where I left off;
- As you can see, there’s definitely the black Lineart Layer and the nice calm green Backdrop Layer. I’ve added the Flat Color Layer between the two.
- First off, if there’s any areas of your drawing that are not completely bordered by Lineart, you should go ahead and close them with the Pencil Tool.
- If there’s a specific part that you want to not have a hard outline border, make an Extra Outlines Layer and draw the border-closing lines there. Put this one above the Flat Color Layer, and you can delete it later. But you still need every section of a distinct color cordoned off. Sort of like a coloring book.
- MAKE SURE that you are working in the Flat Color Layer.
- Go ahead and equip the Fuzzy Select Tool, and make sure the boxes marked Select Transparent Areas and Sample Merged are checked, if not done by default.
- Pick a color from the Color Palette for your webcomic / personal selection. If you don’t have a standard palette, SHAME ON YOU. Make one. You’ll need consistency for this kind of work.
- Select the area you want flooded with your color. If there’s multiple sections you want of the same color that are not contiguous, hold down Shift and you can add those. Make sure everything in your picture that will be of that general color is selected.
- Don’t paint yet! Go to Select → Grow and grow it by one or two pixels (I do one, lazy me.) This will make sure that the color is beneath the ink as well, so that any printing of the picture won’t cause ugly offset and let the background peek through. Or so I’m told. Just do it, anyway.
- Use “Ctrl + ,“. This will fill the area you selected with the foreground color, being the color you selected from the Palette. Make sure that you’re working in the Flat Color Layer.
- Congratulations you have now colored a portion of your image. Repeat for all the different spots with unique Base Colors. Do whatever you like with the Extra Outlines Layer you may have made for the sectiony bit.
- Which reminds me. If when you delete, remove, or otherwise cease the visibility of the Extra Outlines Layer, there happens to be a gap between the two colors, that’s what you get. Working in the Flat Color Layer, you can easily use the Pencil tool to touch up that bit, usually by coloring up the gap manually. It’s fine, just do it.
- I did the eyes a different way. Because of their organic shape (and their lack of an outline border), I simply took the Pencil Tool, set it really big, and drew over the pink area in white, followed by the hazel colors in the smaller areas. Works for me.
—
Next up is adding Value. That means Shading. And Tinting, I suppose, but that word sounds awful tinny, wouldn’t you agree?